USB Rubber Ducky Tutorial: The Missing Quickstart Guide to Running Your First Keystroke Payload Hack
It doesn’t take much imagination to see how you could use this little device to trick your client’s employees (or your friends) into unknowingly installing all sorts of goodies on their computer. Everything from backdoors and keyloggers to programs that max out their volume and blast loud music randomly throughout the day. 😈

The device is cool and can be ordered for around $45. But when the package arrives, it comes with a whole bunch of small parts and no clear instructions for how to get them all working together to set up your first payload.
After a bunch of trial-and-error and following many broken links on the “official” project wiki, here’s what I learned about getting set up.
Rubber Ducky Parts Overview
There are three main parts that come with the Rubber Ducky that you’ll be using to create, test and launch exploits.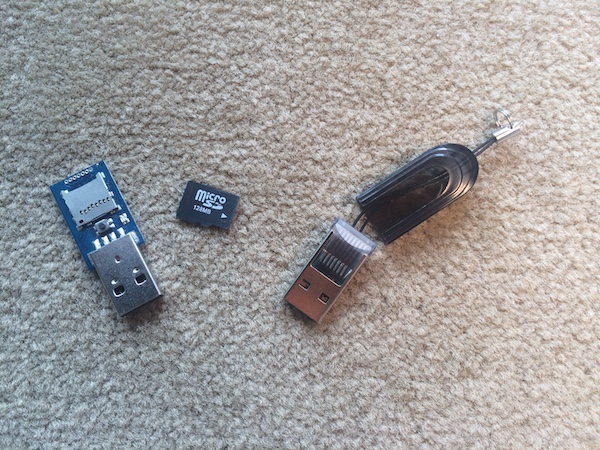
- The mini “keyboard” adapter. This is the larger of the two parts with a USB dongle poking out of it. It’s a silicon chip with a CPU and a slot for inserting the microSD card – the card comes mounted inside the keyboard adapter when you order it. This is the brains of the whole setup, and is what sends in your keystrokes as if they were coming from a “Human Interface Device” (HID) (ie “keyboard”).
- The microSD card. This is a pretty standard piece of
hardware. You’ll receive a fairly small 12MB microSD card, but it has
more than enough space for running most payloads. The only thing that
needs to go on the card is a single
inject.binfile in the root directory. This is what the keyboard adapter uses to know what payload to send in as keystrokes. - The microSD-to-USB adapter. This is the smaller plastic USB dongle that slides into a case. You’ll use this adapter to mount the microSD card on your machine as a normal USB storage device so that you can transfer your payload to it.
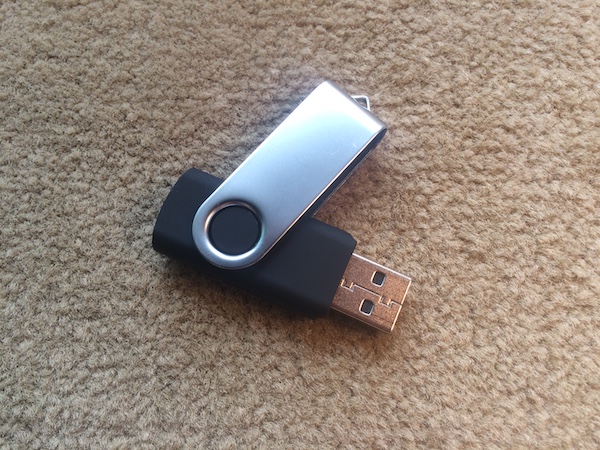
There is also some plastic “camouflage” that can be clipped around the keyboard adapter to make it appear to be a normal USB thumb drive. I don’t recommend you attach this until you’re ready to launch an exploit, since you’ll need access to the microSD card to transfer it back and forth as you’re testing.
Now that you know what the main components are, let’s take a look at building your first payload.
Step 1: Download the Duck Encoder
In order to begin creating our own Rubber Ducky payloads, we need to have the duck encoder installed. This is a program that takes our ducky script (more on that in a minute) and converts it into a cross-platforminject.bin file that the keyboard adapter will use to deliver our keystroke payload.While there are a number of different formats for accessing the duck encoder, including a web interface, if you’re comfortable with the command line, I’d recommend using the downloadable
.jar java program since it allows you to compile the payload and copy it to the microSD card in one step.When I first started testing the device, I used the link on the Rubber Ducky wiki and ended up downloading a very old version of the encoder from 2013 (1.2) which had trouble creating payloads for running keystrokes on newer operating systems.
Instead, I’d recommend downloading the latest version (2.6.3, as of this writing) directly from the github repository, here.
Step 2: Insert the microSD card into your computer
If you do what I did and plug the keyboard adapter directly into your computer, you’ll find that it automatically runs the “Hello World” default payload.On my mac, it wasn’t able to open a text editor to receive the payload, and it end up hijacking my currently open Finder window and renaming my default Macintosh HD to “hello world.”
Not ideal. 😫
If you don’t want to run the payload on your own computer, make sure you swap the microSD card out of the keyboard adapter and into the smaller plastic microSD-to-USB adapter that they provide. This will allow it to mount to your system as a regular USB storage device.
Step 3: Create a payload using Ducky Script
Now for the fun part, creating our very own Rubber Ducky payload. 🙌You don’t have to be a programming whiz to do this. In fact, Hack5 has been nice enough to create their own, very straightforward syntax for building your own keystroke “program.” While a full list of commands can be found here, the most important ones you’ll need to know are the following.
REMallows you to add comments to the program to leave notes to yourself that the program won’t executeSTRINGwill type the remainder of the line exactly as-is into the target computerENTER/SPACEwill hit the “enter” or “space” keys, pretty straightforwardDELAYinstructs the program to wait a number of milliseconds before continuingGUIis like pressing thecmdkey on a Mac or the Windows Key on a PC. You’ll commonly seeGUI SPACEto open the spotlight search on payloads for Macs, orGUI rto open the “Run” dialogue box on payloads meant for Windows systems
Here’s a sample payload I came up with for delivery on a OSX/macOS device.
REM Author: Hartley Brody
REM Description: Testing Mac Payload

DEFAULTDELAY 250

REM Wait for the system to get all set up
DELAY 750

REM Open the "Spotlight Search" and pull up the terminal/cli
GUI SPACE
STRING terminal
ENTER

REM Send a command to the machine through the terminal/cli
STRING say 'you have been hacked'
ENTER
DELAY 2000

REM Close the terminal window so there's no trace left behind
GUI q
Then it runs the
say command
that does text-to-speech on Macs, and instructs the program to say “you
have been hacked”. Finally, it waits 2 seconds to ensure the say program is finished speaking, and then uses cmd-Q keystroke to close the terminal window so that we don’t leave a trace of what we did open on the machine.
Step 4: Compile Your Ducky Script into an inject.bin
Now that we’ve got a Ducky Script payload that we’re ready to test,
it’s time to compile it and transfer it to the microSD card so that we
can slip that into the keyboard adapter and have it run when it’s
inserted into a target machine.To do that, we’ll use the Duck Encoder from step #1 to compile our custom Ducky Script from step #3, and also copy it onto our microSD card.
First, let’s run the downloaded
.jar java program from the command line with no arguments to see all of the options:➜ ~ java -jar ~/Downloads/duckencoder.jar
Hak5 Duck Encoder 2.6.3
Usage: duckencode -i [file ..] encode specified file
or: duckencode -i [file ..] -o [file ..] encode to specified file
Arguments:
-i [file ..] Input File
-o [file ..] Output File
-l [file ..] Keyboard Layout (us/fr/pt or a path to a properties file)
Script Commands:
ALT [key name] (ex: ALT F4, ALT SPACE)
CTRL | CONTROL [key name] (ex: CTRL ESC)
CTRL-ALT [key name] (ex: CTRL-ALT DEL)
CTRL-SHIFT [key name] (ex: CTRL-SHIFT ESC)
DEFAULT_DELAY | DEFAULTDELAY [Time in millisecond * 10] (change the delay between each command)
DELAY [Time in millisecond * 10] (used to overide temporary the default delay)
GUI | WINDOWS [key name] (ex: GUI r, GUI l)
REM [anything] (used to comment your code, no obligation :) )
ALT-SHIFT (swap language)
SHIFT [key name] (ex: SHIFT DEL)
STRING [any character of your layout]
REPEAT [Number] (Repeat last instruction N times)
[key name] (anything in the keyboard.properties)
.jar file I
downloaded is in my Downloads folder in my user’s home directory. Update
the file system path to be wherever you moved the duckencode.jar file in step #1.To actually compile our Ducky Script, we’ll re-run that same command, but this time we’ll also pass a
-i flag with our “input” (the Ducky Script text file we created in step #3) and the -o flag for our “output”.Note that I set the output to be the same path as the microSD card that is mounted to my mac, plus the “inject.bin” filename:
/Volumes/NO\ NAME/inject.bin. You may need to change this value depending on where the microSD card mounted on your system.java -jar ~/Downloads/duckencoder.jar -i ~/rubber-ducky/hello-world.txt -o /Volumes/NO\ NAME/inject.bin
Hak5 Duck Encoder 2.6.3

Loading File .....    [ OK ]
Loading Keyboard File ..... [ OK ]
Loading Language File ..... [ OK ]
Loading DuckyScript ..... [ OK ]
DuckyScript Complete..... [ OK ]
Step 5: Test it on yourself!
Now that you’ve successfully compiled your payload and moved it to the microSD card, you’re ready to run the payload on a computer through the keyboard adapter.Eject the microSD card and remove the microSD-to-USB adapter from your computer. Make sure you wait until the card actually ejects, as I’ve had problems running the payload whenever I’ve gotten antsy and just ripped it out. 🤦️
Slide out the microSD card and insert it back into the keyboard adapter that it came in. Plug that keyboard adapter into your computer, sit back and watch it work!
If you want to re-rerun the payload without removing and re-inserting the keyboard adapter, you can press the round black button that’s just below the microSD slot.
This is a great feature in case the payload doesn’t run correctly the first time, maybe because there was other mouse or keyboard input interference while it was running.
Browse through Ducky Script Payloads
If you’re really eager to get started with more impressive payloads, you can browse through the repository of Ducky Script payloads on github.This is an awesome list of Ducky Scripts that others have written, tested and shared for free. It can be a good overview of what you can accomplish on a target system, and can be a great source of inspiration when writing your own payloads.
Verify the Code
Before you go and copy one of the payloads and use it exactly as-is, make sure that you read through it and try to understand what it’s doing on the target system. This a standard caution whenever you’re looking to borrow some exploit payloads that you find on the internet.
Also make sure that the payload you’re looking at is designed with your target platform (operating system + version) in mind. Different platforms tend to have unique keyboard layouts and the exact keystrokes needed to setup a shell on a macOS machine will be pretty different from the ones you need to do the same on a Windows computer. Even different versions of Windows can have different keyboard shortcuts or locations for important files.
Saving You Time
While writing my own Ducky Scripts, I found that testing small tweaks can be a cumbersome. Each change requires:
- Ensuring the microSD card is plugged in as a storage device
- Updating and saving your Ducky Script
- Running the
duckencoder.jarcommand to compile and transfer the payload - Eject the microSD card (and wait for it to actually eject ⏳)
- Transfer the physical microSD card into the keyboard adapter
- Finally, plug the keyboard adapter into your test system to see how it runs
A Few Tips
Now that you’re up and running with your own Ducky Scripts, here are a few tips I’ve learned for making the most of your USB Rubber Ducky.Make sure you know what platform your payload will run on
As mentioned earlier, ducky scripts that work for, say, macOS almost certainly won’t work for Ubuntu or Windows machines. And a ducky script that works against the latest version of Windows 10 may not work at all on an older, unpatched Windows 7 machine.
As always, OSINT is the foundation of any successful security operation.
Keep your options open with multiple microSD cards for different platforms
If you’re trying to do on-premise testing with a client and you’re not sure which operating system their workstations use ahead of time, it might be helpful to have a few labeled microSD cards with payloads for different platforms.
You might only have a few seconds of physical access to their machine, so it’s important to be able to work quickly to deploy your payload.
Don’t be scared to use
DELAY and DEFAULTDELAYWhile it’s tempting to remove all of the
DELAY
statements in order for your ducky script payload to execute as fast as
possible, remember that the target computer may take time to process
your previous command before it’s ready to accept the next keyboard
input.It’s better to have things pause on the screen for a little bit and add a few extra seconds to your program’s execution than it is to fire off keystrokes so fast that they get lost before programs open or are ready to accept input.
It’s especially important to add a
DELAY
to the beginning of your ducky script so that the first few keystrokes
aren’t lost before the victim’s computer has fully recognized the new
“keyboard” that has been plugged in.Test, test, test.
The only way to “know” how your payload will perform on your target machine is to run simulated exploits on a similar platform. If you’re not running the same operating system version and service pack as your target machine, try to get a local environment setup using something like VMWare.
Practice plugging in the USB rubber ducky to watch how it runs, and using the physical button to re-run the payload if it fails initially. You may notice errors that aren’t apparent from just reading the ducky script, like commands that happen too quickly or different keyboard shortcuts that don’t trigger the action you were expecting.
Good luck, and happy hacking. 🐥


No comments:
Post a Comment